Progression of design for wallhanging
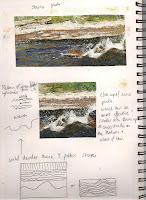
This is my source photo

I made a collage with fabric and paper, roughly echoing the textures and colours in the photo
I divided a seascape photo into squares and rearranged them as collage , rotating each one before placing it on the paper. I repeated the exercise with tiny squares from the source photo using a photocopy

Then I tried experimenting with strips from the source photo
First just dividing up the picture. Then trying it in 3 larger sections

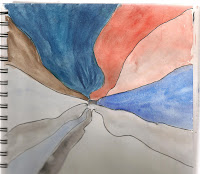
In the last design I took one of the tiny squares and drew lines out from it, using the original colours

Now I have to focus and stop playing around too much with the design. As soon as I decide where I am going with this, and which design to use, I can get on and make the working rough which I need to have ready for Thursday's class. Maybe if I put the sketchbook to one side and work on something else inspiration will strike from my subconscious!

Interesting to see the thought process - I was especially struck by the fabric and paper collage and the very simple cutting up into strips & arranging horizontally or vertically.
ReplyDelete...mind you, whichever way you arrange things, 1 metre is a very large space to fill!!
Rosemary